



 +94 (0) 31 228 1114
  info@cocopeatcoirmulch.com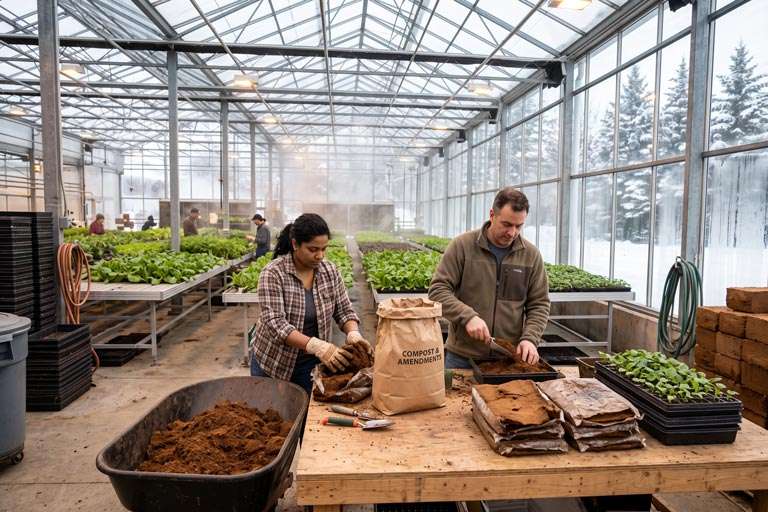

Reusing Coco Coir: 7 Steps for a Healthy Second Crop
Reusing Coco Coir for a Second Crop: 7 Steps That Protect Your Yields
Reusing coco coir sounds like a no-brainer. You’ve paid for the bags, they’re still sitting on the gutter, and the last crop’s roots barely made a dent in them. So why throw them out? Here’s the thing: it can save real money, but only when you treat the second crop like a fresh start and not like a shortcut. This guide walks through seven steps that growers of tomato, pepper, cucumber and berries use to clean, test and recharge their media before the next planting.
Don’t worry, none of it needs fancy kit. Most of it needs a clear head, a good EC meter and a bit of patience.
Why would anyone bring old coir back for another round?
Let’s start with the money. Media is one of the few inputs you can take a second bite from. A grow bag that finished a tomato season is usually still firm, still full of fibre and still able to hold water. Coir is tough stuff. Its high lignin content is why it breaks down slowly compared with peat, and it’s also why a used slab doesn’t turn to mud after twelve months.
There’s a waste angle too. Hauling hundreds of spent bags out of a house costs labour and disposal fees, and the pile never looks smaller than you expected. Cut that load in half and your crew will notice.
Does the science back this up? Partly. According to Wikipedia’s entry on coir, coir fibre can be reused up to three times with little loss of yield, as long as it didn’t come from diseased plants. That last clause is the whole story. Two cycles is a sensible target for most commercial greenhouses. A third only makes sense when drainage tests, root health and lab numbers all look clean.
The gap between crops is shorter than you think
Timing matters more than most people admit. In Ontario or the Netherlands, a winter-to-spring turnaround might give you three or four weeks. In a hot Dubai house, the pause can be even shorter because the next planting date is tied to a market window. That’s not much time to flush, steam, test and rebuild. Plan the whole routine backwards from your planting date, and book steam crews early.
It also helps to treat each house as its own case. A pepper house that grew in clean water all season is a different story from a cucumber house that fought root rot in July. Same farm, same bags, very different odds.
Reusing coco coir: when it works and when it doesn’t
It works when the first crop was clean. Roots were white and fat at the tips, there was no Pythium or Fusarium in the house, and nobody saw a virus symptom on the leaves. It also works when the bag still drains evenly and hasn’t slumped into a flat pancake.
It doesn’t work after a disease problem, and I’d say that twice. A virus such as ToBRFV in tomato can cling to debris and surfaces, and steam won’t always settle the argument. If you’ve had it, the bags go out. No debate. The same goes for heavy salt damage, where the fibre has carried far too much sodium or chloride for too long.
So the first job is honest scouting, not clever chemistry. If you can’t say the last crop was healthy, don’t plan a second one in the same bags.
The seven steps, one at a time
Here’s the routine in the order most growers run it. Skip a step and you’ll usually feel it by week three.
Step 1: Read the roots before you decide
Pull bags from several rows, not just the pretty ones near the door. Slit them open and look. Healthy roots are pale and fill the fibre evenly. Brown, slimy roots with a sour smell are a red flag, and so is a bag that stays soggy at the bottom. Spent coco coir that smells earthy and shows white root tips is what you want to see.
Take a drain sample from the same rows and send it to your lab. Numbers beat guesses. A few dollars now saves a bad surprise in a month.
Step 2: Cut the crop and clear the old roots
Cut the plants at the base and leave the bags alone for a few days. The roots dry out and shrink, which makes them far easier to pull. Then take out every stem, clip, drip stake and root clump you can find. Dead roots feed fungus, and fungus is the last thing you want waiting in a warm, wet bag.
It’s dull work, no question. But a clean bag now means fewer root disease problems in coco coir later, and that’s a trade most crews accept.
Step 3: Flush the salts out
Over a full crop, coir collects potassium, sodium, chloride and leftover fertiliser. Flush each bag with clean water, at least two to three times its volume, until the drain EC sits close to your irrigation water. Many growers aim for below about 1.0 dS/m, especially for salt-shy crops like strawberry.
Let the bags drain fully between flushes. Rushing this step is like rinsing a dirty mug with the tap barely on; it looks fine and it isn’t.
Step 4: Steam sterilising coir the right way
Steam sterilising coir is the cleanest route for most farms, because it leaves no chemical residue. Many growers aim for a core temperature of roughly 80 to 90 degrees Celsius for at least 30 minutes, though you should ask your steam contractor for the protocol they’ve tested on your crop. Moist coir carries heat well, while dry, packed fibre heats unevenly, so loosen it and wet it first.
Steam isn’t the only choice. Some farms flush the bags with a hydrogen peroxide or peracetic acid solution instead, which is simpler on small blocks. Whatever you pick, let the bags cool before planting. Hot fibre and young roots don’t get along.
Step 5: Test, then reset pH and EC
This is the coco coir pH and EC reset, and it’s where a lot of second crops are won. Coir can drift to a higher pH over several months, and a drift of even half a point changes how well iron, manganese and phosphorus are taken up. Test the medium, then adjust with acidified water until the root zone sits near pH 5.8 to 6.2 for most fruiting crops.
Check the EC again after steaming. Heat can release a little more salt from the fibre, so a second reading is worth the two minutes.
Step 6: Recharge calcium, magnesium and structure
Coir holds onto calcium and magnesium and gives up potassium. After a full crop, those holding sites are crowded with potassium. Think of a car park that’s full of the wrong cars. Soak the bags with a calcium and magnesium solution so the right nutrients move back in and the extra potassium moves out.
If a bag has gone flat or drains slowly, blend in 20 to 30 percent fresh material to open it up again. Hydrated pith from a Coco peat Bale is handy for this, since you can mix it straight into the old fibre and re-fill the bag.
Step 7: Re-plant and watch week one like a hawk
Make new planting holes away from the old ones, and start with smaller irrigation pulses than you’d use in a fresh bag. Check drain EC and pH every day for the first week. If the numbers wander, correct them early.
Here’s a trick I like: set a handful of fresh Coco Peat Grow Bags in the same row as a control. If the reused plants keep pace with the controls through flowering, you’ve got your answer for the rest of the house. If they lag, you’ve learned it cheaply.
What about coir that can’t go round again?
Some bags will fail the test, and that’s fine. Coir waste recycling is easy when the crop was healthy. Spread it as mulch under orchard trees or berry rows, work it into field soil as a conditioner, or blend 10 to 20 percent into potting mixes. Composting it with clean crop residue works well too.
Bags from diseased crops are different. Don’t spread them on any growing land. Follow your local rules for disposal, and keep a record of which house they came from so you can rethink the next planting there.
What growers say about a second crop in the same bags
I used this seven-step list as a printed walk sheet for a client’s cucumber house, and the crew followed it without any fuss. Having each step written down mattered more than I expected. People forget the flush when the schedule gets tight.
Our customers are really happy with the coir bags we supply, and a tomato grower in Canada put it this way: “The second crop in the same bags grew as evenly as the first, once we flushed them well and reset the feed. We only had to replace the few bags that stayed wet.” That’s the pattern I hear again and again. Clean first crop, careful reset, steady second crop.
Does it always go that smoothly? Of course not. Weather, water quality and crop load all play a part. Which is why the control row is such a cheap bit of insurance.
A simple way to make the call
Ask three questions. Was the last crop healthy? Do the bags still drain evenly? Did the lab numbers come back close to normal after the flush? Three yeses, and a second crop in coco grow bags is a smart move. One no, and you should think hard. Two nos, and it’s time to buy fresh.
That’s all there is to it. Reuse isn’t a gimmick, but it isn’t free money either. Treat it like any other input decision: test it, track it, and keep what works.
Frequently Asked Questions
How many times can you use coco coir in a greenhouse?
Most commercial growers get two crop cycles from a grow bag or slab when the first crop is healthy. Coir fibre can sometimes be used a third time, but only if drainage, root health and lab results stay clean.
Is it safe to put a new crop in old coir after tomato?
Only if the tomato crop was free of disease. After a virus such as ToBRFV or a root rot outbreak, dispose of the bags instead of trying to clean them.
How do you sterilise used coir between crops?
Steam is the most common method, with the core of the medium held at around 80 to 90 degrees Celsius for at least 30 minutes. Some farms use peroxide or peracetic acid flushes on smaller blocks. Always flush the salts first, because steam works better on clean, evenly wet fibre.
What EC and pH should used coir have before replanting?
Aim for a drain EC close to your irrigation water, often below about 1.0 dS/m after flushing, and a root zone pH of about 5.8 to 6.2 for most fruiting crops. Test again after steaming and adjust before planting.
What can I do with old coir that failed the test?
If it came from a healthy crop, use it as mulch, a soil conditioner or a portion of a potting mix. If the crop was diseased, follow your local waste rules and keep it away from growing land.
